用Swift写了一个从后端获取数据来展示话题和评论的Mac客户端, 用了MVVM模式
MVVM即Model、View和ViewModel
用ViewModel是为了视图和业务逻辑之间的解耦
从我的项目文件结构中应该能更加清晰说明这个:
-CommentSystem

    -PageModel.swift

        -PageService.swift

        -PageData.swift

    -PageViewModel.swift

    -PageView.swift
“ the View “knows” about the VM, but the VM knows nothing of the View. This is the blindest date ever “
MVVM实现的是单向数据流,Model提供接口给到ViewModel,再通过ViewModel提供接口给到View
Swift中的实现
Model是底层上通用的一些数据和业务逻辑,自然就不用多提了
重点是ViewModel:
以下为这个项目的实现
1
2
3
4
5
6
7
8
9
10
11
12
13
14
15
16
17
18
19
20
21
22
23
24
25
26
27
28
29
30
31
32
33
34
35
36
37
38
39
40
41
42
43
44
45
46
47
48
49
50
51
52
| import SwiftUI
import Combine
public class PageViewModel: ObservableObject {
@Published private(set) var title: String = ""
@Published private(set) var contents: String = ""
@Published private(set) var posts: [Post] = []
@Published private(set) var errorMessage: String?
@Published private(set) var cteateTime: Int64 = 0
private let service: PageServiceProtocol
init(service: PageServiceProtocol) {
self.service = service
}
func loadPageById(input: Int) {
Task{
await load(pageId: input)
}
}
func loadPageByTopic(input: String){
Task{
await query(title: input)
}
}
private func query(title: String) async {
do {
let idData = try await service.fetchTopicId(title: title)
await load(pageId: idData.id)
} catch {
self.errorMessage = error.localizedDescription
}
}
private func load(pageId: Int) async {
do {
let pageData = try await service.fetchPage(Id: pageId)
self.title = pageData.data.Topic.title
self.posts = pageData.data.PostList
self.cteateTime = pageData.data.Topic.create_time
self.contents = pageData.data.Topic.content
} catch {
self.errorMessage = error.localizedDescription
}
}
}
|
我们把ViewModel直接作为一个类,
并使用ObservableObject*来定义它,待会儿在View中就可以用ObservedObject来监听它的ViewModel,@Published是你要向上开放的字段,也就是View要访问的字段,而func loadPageById和func loadPageByTopic则是View要使用的逻辑方法
在这段中可以注意到的一点是
1
2
3
| init(service: PageServiceProtocol) {
self.service = service
}
|
这里用到的service就是由Model提供上来的接口,viewModel中的所有字段和方法均由Model提供的数据和方法来实现
接下来是View去调用
原项目ui代码太多太杂了,以下为一个简化过了的实现:
1
2
3
4
5
6
7
8
9
10
11
12
13
14
15
16
17
18
19
20
21
22
23
24
25
26
27
28
29
30
31
32
33
34
35
36
37
38
39
40
41
42
| import SwiftUI
public struct ContentView: View {
@ObservedObject var viewModel: PageViewModel
@State private var input = ""
public var body: some View {
VStack {
Text(viewModel.title)
.font(.title)
if viewModel.contents.isEmpty {
Text("Loading...")
} else {
Text(viewModel.contents)
}
HStack {
Button("Home") { viewModel.loadPageById(input: 1) }
Button("教程") { viewModel.loadPageById(input: 3) }
Button("赞助Modo") { viewModel.loadPageById(input: 2) }
}
TextField("Search", text: $input)
.textFieldStyle(.roundedBorder)
.onSubmit {
viewModel.loadPageByTopic(input: input)
}
List(viewModel.posts, id: \.content) { post in
if let url = URL(string: post.content),
url.scheme?.hasPrefix("http") == true {
Link(post.content, destination: url)
} else {
Text(post.content)
}
}
}
.padding()
.onAppear {
viewModel.loadPageById(input: 1)
}
}
}
|
通过@ObservedObject监听ObservableObject即ViewModel的变化
当@Published变量改变时刷新View
public var body: some View{···}中的内容为具体的界面ui,可以看到全都采用ViewModel实例提供的数据和方法来实现
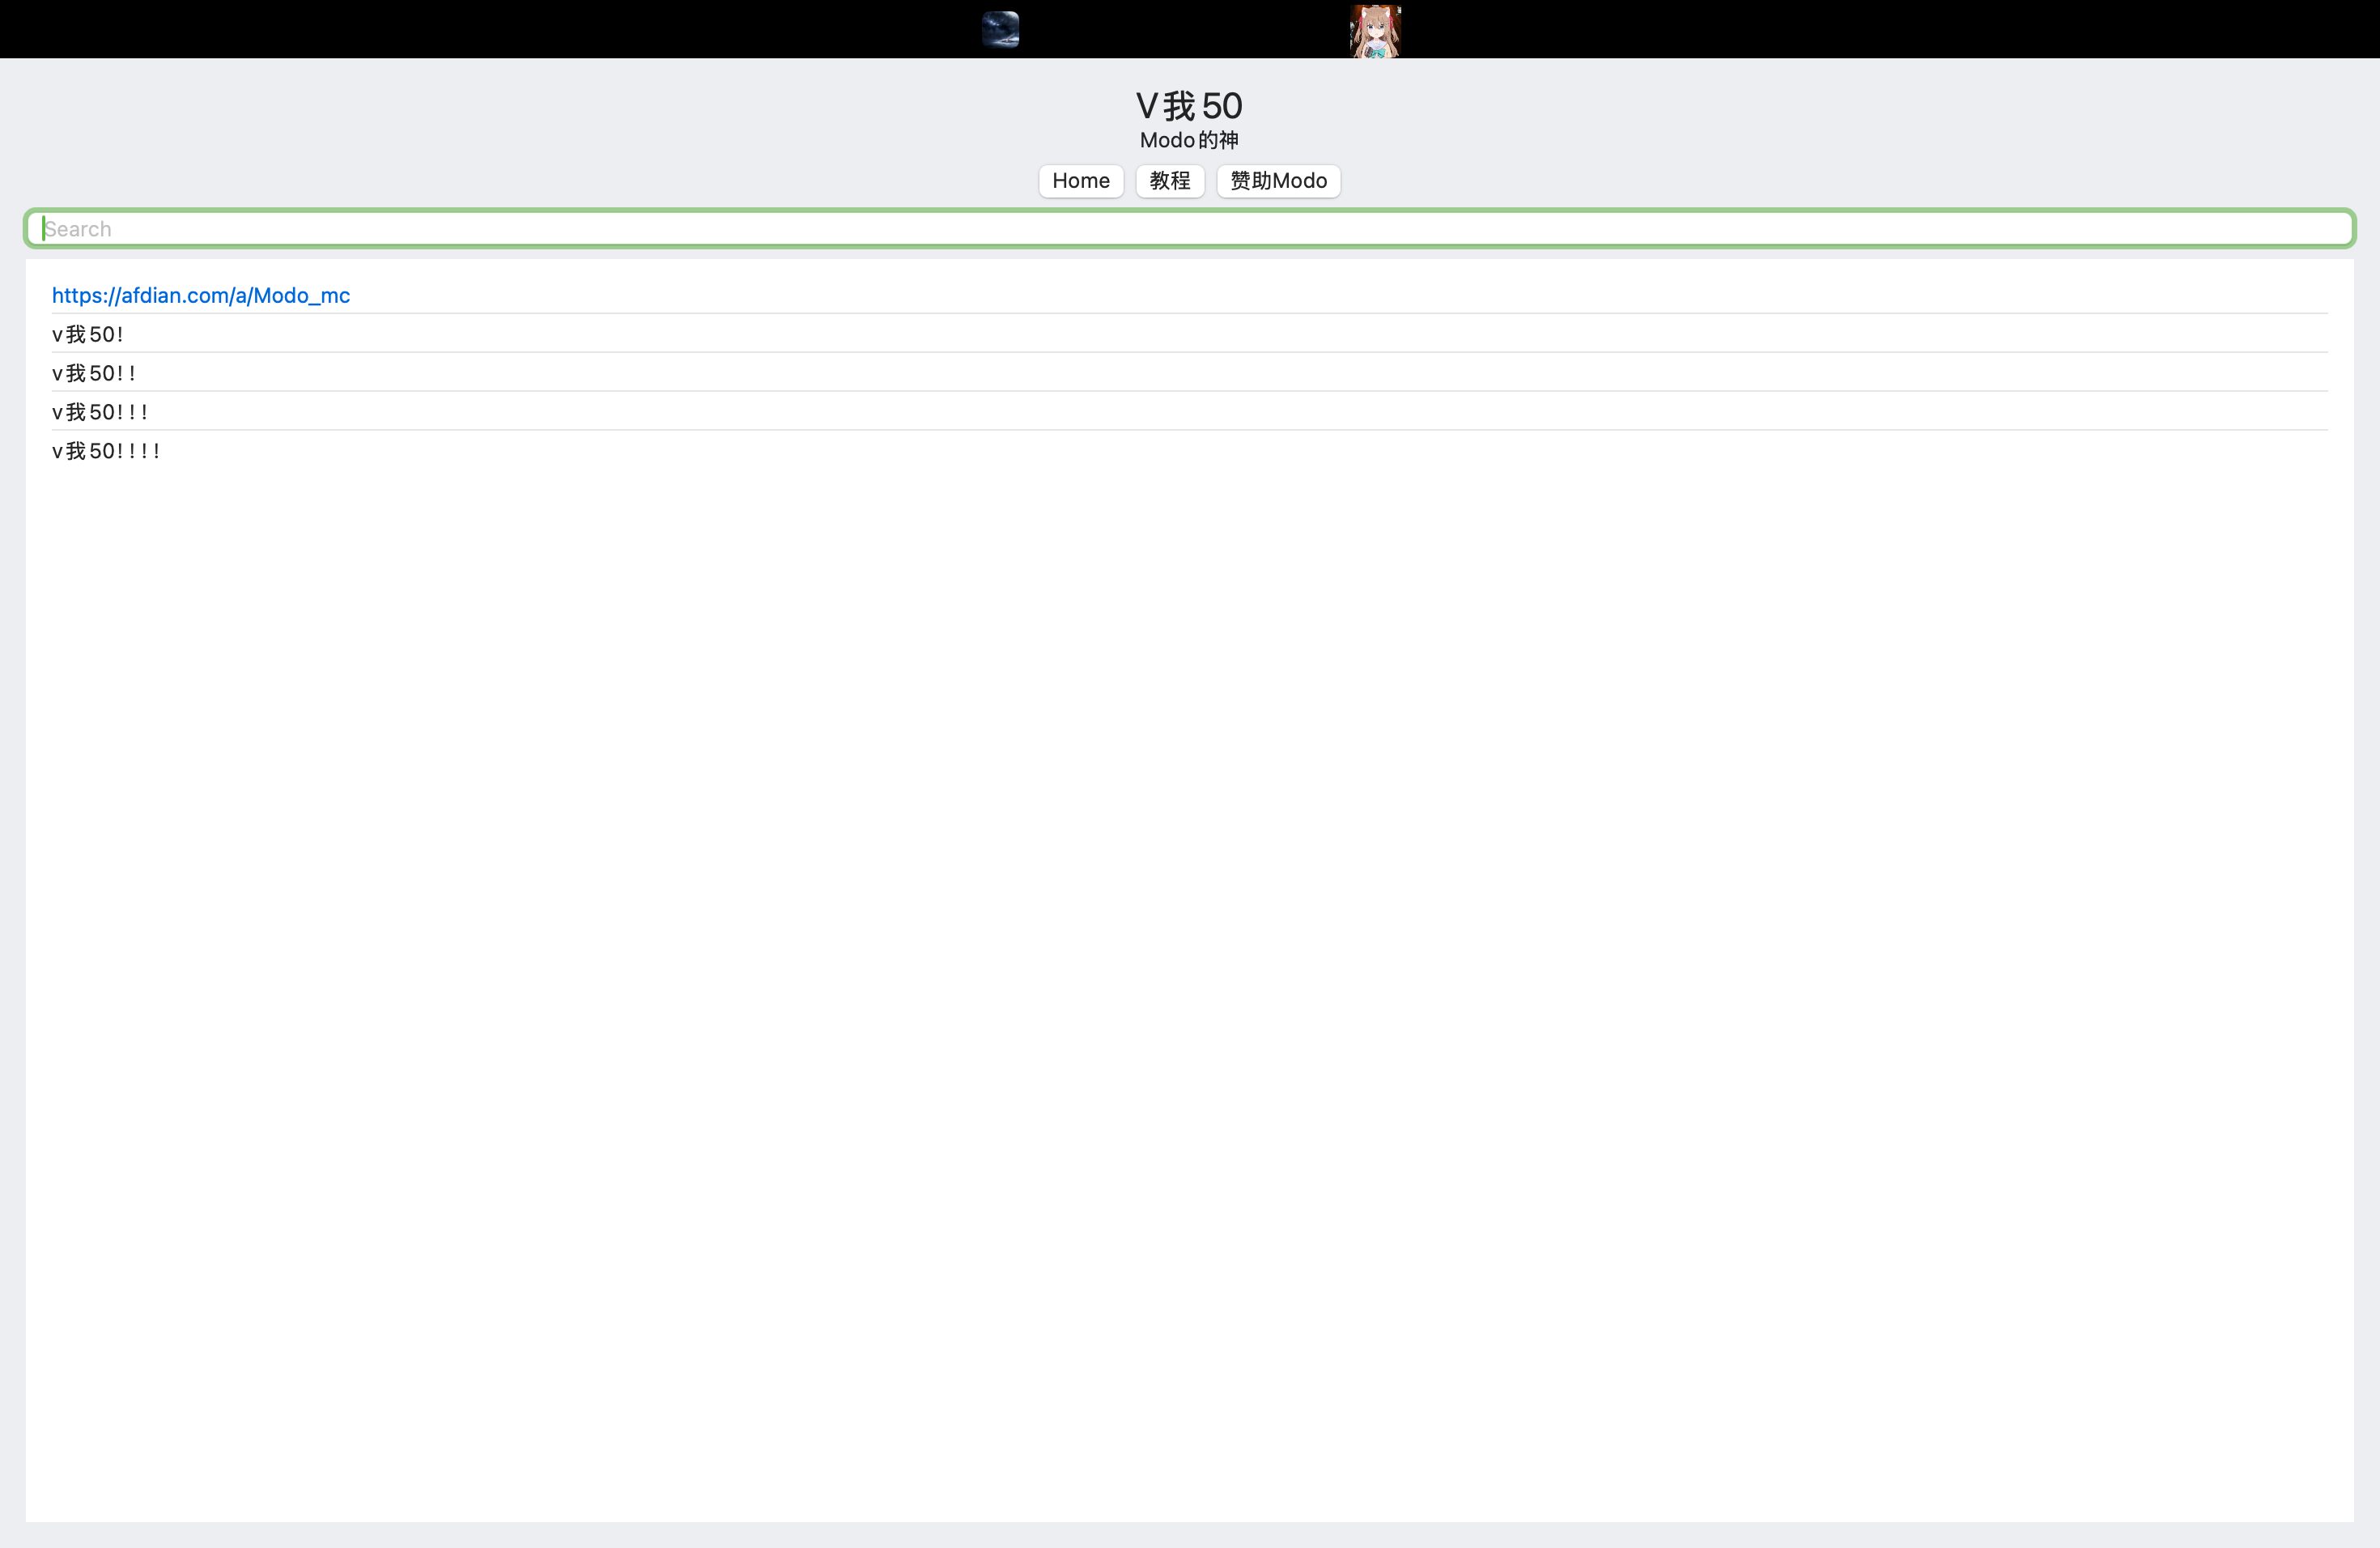
ui界面如下: